Auto is not your only option if you aren't yet comfortable setting your aperture, shutter speed, etc manually. Your camera can make a lot of decisions for you, but it helps if you give it a few hints. Enter: scene modes.

(image from Leo Reynolds)
Your camera may have a number of icons as above or it may just have the letters SCN as an option on the dial, which will pull up another menu on your screen listing all your scene mode choices. It may seem self-explanatory but let me just point out some situations you might want to choose one or the other.
Portrait Mode
This one is usually noted by a person's head. What happens inside the camera on portrait mode is that it will open up to the largest aperture available. It is best for a single subject – or a cluster of people – moderately close to you. The background will be out of focus, giving that nice, soft blur. How much blur depends upon the maximum aperture of your camera/lens. This picture was taken with a 50mm lens. My daughter's compact camera has a much smaller maximum aperture so the blur would not be quite as marked with hers.
Portait mode will usually have a slightly less sharpening than other modes. Unless you are shooting manually, your camera is recording jpeg images. It is deciding to sharpen them to different extents. In portrait mode it is going to sharpen with a light hand so as not to emphasize fine lines and blemishes.
This mode isn't only for people however. Any time you'd like to isolate your (stationary) subject and achieve an artsy effect you can try this option. And although children ARE in fact people, this mode doesn't always work well for them. More on that in a bit.

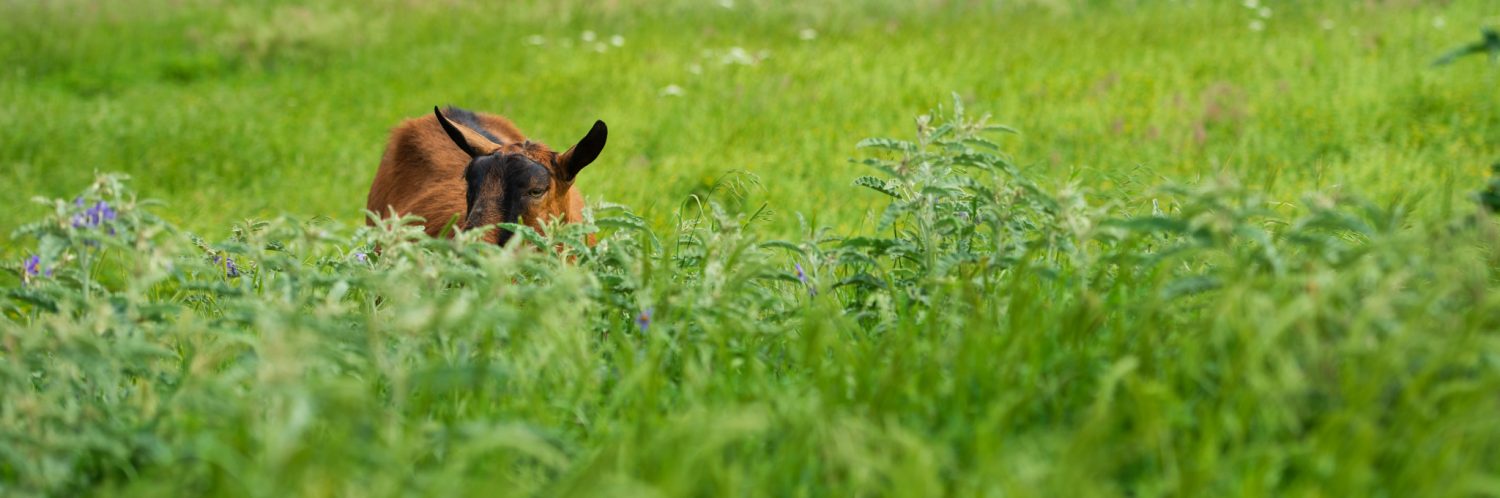
above: portrait mode
below: landscape mode

Landscape Mode
Likewise, landscape mode is not just for landscapes. Landscape mode, usually indicated by a mountain peak icon, tells your camera to shoot at a wide angle bringing the entire scene into focus at once. Wide angle means you be zoomed out getting as much of the scene into the viewer as possible. Things close to you, as well as those things in the distance will be in fairly sharp focus.
If you want to get a picture of your husband with a mountain range or a national monument off in the distance, this is a good mode to try. If you choose portrait mode simply because you have a person in the picture, you are going to be disappointed when you get home and the White House behind them is all fuzzy. : )
Sports Mode
…also not just for sports and actually not ideal for some sports events. You can find this option by looking for a runner. What happens in sports mode is that your camera is programmed to a fast shutter speed to try to freeze the action in your scene. Because the shutter is only going to open for a split second, the camera is going to have less light reaching the sensor. Therefore, it works best when there is a lot of light available (outdoors is best) or the flash is used.
Although people are indeed moving at dance recitals, for instance, the dimmed lights of a theater may not be sufficient when coupled with that fast shutter speed. If you cannot use flash then you may not get a good image on sports mode in that sort of situation. (for the record it is challenging to get good sharp images of stage performances even when shooting manually unless you have equipment specially suited for it)
Your camera is also going to give you a shallow depth of field in sports mode – blurring the background some. This mode prompts your camera's auto-focus to follow a moving subject, attempting to continually keep it in focus. Because kids are usually in motion, you may well have better luck using this mode vs. portrait when shooting children outdoors.
Don't be swayed by the names.

above: auto
below: sports mode

Macro Mode
Like those superclose up images of everyday objects? They draw your attention to oft-overlooked details. Since they are usually stationary, and you want to isolate your subject, a portrait mode often works here too. Because you are zoomed in to your subject, there is little room for error by way of camera shake. It is almost impossible not to jar the camera just a little when you press the shutter, so it's a good idea to use a tripod – even for your point and shoot camera. It will help to get those crisp details you are aiming for. If you don't have a tripod, you can try setting your camera on a bean bag or stack of books and using the self timer or a remote release. It really can make a difference.
 above: macro mode
Night Mode
Your camera probably has a night mode as well. It may have two – one with a moon and one with a star. The difference is whether the flash fires or how intense the flash will be. Ideally it tells the camera to shoot with a slow shutter speed to preserve as many details in the low light scene as possible. Because it is shooting at a slow speed you will again have better luck using a tripod so you reduce the risk of camera shake.
Ultimately your best results come from experimentation. That is the beauty of digital photography. You can shoot to your heart's content for practice and then delete.
Weekend Challenge:
Set up a scene and shoot it in several modes to see which comes closest, under those conditions, to what you had in mind. Use your playback/preview button to compare your images in the LED screen afterwards. This becomes even more helpful when you begin to shoot in manual. You will study the settings used on your best pictures to learn why they turned out so well. Even in scene modes, your camera will usually record the icon of the mode used to take the picture so you have that future reference. If not, keep a notepad handy.

OK…so I need to learn to use more than a few buttons and settings on my $700 Nikon? Seriously. I am so lazy about it, and I always forget. In some ways, I long for my old Canon AE1, my first SLR–so simple. But, details…the thing that always jumps out at me from your portrait photos are they eyes. How do you get them so crispy-crystal-clear? Must I don my specs and use manual focus????
Also…? Oh, that’s a runner on the dial!! Lol!!
LOL yes on both counts.
And on the focus – there isn’t a single answer to that question. It is combination of lenses (some have vibration reduction), focus settings, manual exposure (which also allows for custom sharpening incamera), controlling camera shake, and post processing. We’re just going to have to take all those one thing at a time. ; )
Camera’s also tend to underexpose in all auto modes in my experience which compromises the clarity. And they don’t spot focus in auto.
If you have a dslr you can probably override the auto focus in auto modes by moving to manual on the lens and manual on the option right next to the lens connection. That will help. On point and shoots, get your instruction manual out and set it for face recognition focusing. Most have this.
Since you showed me a bit of this the other day I have been playing more with the settings on my camera. If possible I have been taking pictures in several modes; Auto, a few scene modes and the A (aperature priority) at both extremes. I feel like I am starting to understand what the camera is doing a little better and am ready for my next lesson. – Thanks
This is HUGELY helpful, as were the quick tips last week. Thanks! On a Nikon, what’s the icon for Macro mode, please?
Aw snap. I reread and realized I didn’t mention that! Sorry. Its the flower. I think that is the universal macro mode symbol.
Fredrick Verdin
Im grateful for the blog.Much thanks again. Really Great.